Going Bananas, Part 2

Standard

LAST DAY!!  YIPPEE!!  For those of you who are concerned that teachers don’t love their jobs, rest assured, we do.  After 9 months though, we need a few months to recharge our batteries for the next batch of eager learners.  So with today being the last day, I’m sure you’re thinking I will have tons of time to make fresh dinners every night.  While I may have time, it’s already inching close to 100 and will be over it in the next week to come.  So anything that I can do to avoid heating up my house is important.  In our search for banana recipes the other day, we came across a blueberry banana bread recipe.  All I can say is YUM!  It was breakfast this morning along with a yogurt (gotta have that protein for the last day!!) and we were out the door to give teachers gifts and get the classroom ready for eager students and a BBQ.  I found this recipe on Pinterest and it made 2 loaves (smaller loaf pans).  I wish I could share this recipe here with you, but the author felt I was violating copy-rite laws.  So I have removed the recipe and the link to her website.  However, you can easily search search my Pinterest board for Blueberry Banana Bread and find it there.  Sorry everyone!


Going Bananas!!!

Standard

What a busy week- it’s already Thursday night!!! The last week of school is always a busy one for moms, dads, and kids. Moms who are teachers have double duty end of year craziness!!

Last weekend I spent a day freezer cooking with my sister-in-law. We knocked out a month’s worth of dinners in a day. I was worried I was going to be behind the ball this week because I didn’t have any breakfasts- so I also whipped out a bunch of burritos and french toast sticks. All set for the week….

THEN…. I saw an amazing deal at our local fruit stand. Living in Central California, I have always been spoiled with fresh fruit and vegetables in the summer. Juicy sweet peaches, plums, apricots, corn, fresh green beans, the list goes on and on. Our small garden is over flowing. I digress. This amazing deal was for 50 (yes that’s 50!) pounds of bananas for $5!!! I know many of you are thinking, really??? 50??? How many is that? A whole packing box- 2 layers deep. The curveball in the bananas was that they had to be used that day- they were already starting to turn. SOOOO….. Pinterest to the rescue.

My loving husband helped make banana pancakes, banana muffins, banana bread, banana cookies, and well, you get the idea. We froze lots of them (peeled first) for smoothies and ice cream. Here’s the first of several banana recipes. Found on Pinterest, this can be either a yummy dessert or fun option for breakfast.

Banana Quesadillas

Ingredients:
Bananas
Tortillas
Peanut Butter
Chocolate Chips

1. Spread peanut butter over entire tortilla.
2. Place sliced bananas over half and sprinkle with a few chocolate chips.
3. Fold over and place on griddle.
4. Cook on both sides until lightly browned and melted inside.

We wrapped them up and froze them. The kids had one for breakfast the next morning and enjoyed it cold from the refrigerator. You can reheat them if you like. Yummy, handheld, and filled with protein = WIN!

Follow my blog for more banana recipe to come. I promise to have some non-banana recipes next week too. School ends tomorrow and I’ll have a few days before starting summer school (and unpacking my new classroom) to share some easy and quick summer recipes.

Dessert is Calling!

Standard

I’m not a big dessert person. In fact, we rarely have dessert. Is it because we don’t eat sweets? Maybe. It’s probably more because making dessert seems to take up more time. There’s that ‘T’ word again. However, with my freezer stocked, even desserts can be quick and easy. It was a mice surprise last night when I pulled out a cake and we all enjoyed a slice. I’ve always read about people who make pie fillings and stick them in the freezer for a quick and simple pie, or the organized moms that have cookies in the fridge for the lunch boxes. Hmm, something for me to work on. Here’s the recipe for the Pumpkin Apple Cake. Truth be told, I had some cans of pumpkin in my pantry that I needed to use and so I searched for recipes with pumpkin and found this cake. Enjoy friends! oh, My husband says, don’t skip the powdered sugar.

Apple Pumpkin Spice Cake

Kim @ onceamonthmeals.com, adapted from Iowa Girl Eats
Ingredients:
0.5 cups butter softened
1.5 cups sugar
0.5 cups pumpkin puree
0.75 cups unsweetened applesacue
2 medium eggs
2 teaspoons vanilla extract
3 cups all purpose flour
1 teaspoon cinnamon
1 teaspoon baking soda
1 teaspoon baking powder
0.5 teaspoons salt
3 cups Granny Smith apples, peeled and diced
0.25 cups powdered sugar (for serving day)
cooking spray or oil for greasing pan

Please visit Once A Month Meals for the directions to make this easy and delicious cake.

Easy Dinner and lunch too!

Standard

The last few days have been such wonderful days and easy nights.  I know I have just jinxed myself and everything will hit the fan tomorrow, but for now I am going to bask in the cool breezes that are blowing my wind chimes and relish in the fact that I have a mostly clean house, school work caught up, and 2 kids asleep in bed.  Truth be told this is such a rare moment that  I must mark it on the calendar, or this blog.  The other day I mentioned this blog to some friends at work as they were asking me about my delicious lunch, recipe to come later.  They wondered when I could possible have time to write.  To be honest, it’s not every night.  But since I have dinner done in short order when I get home, I have more time for me, and writing this blog is a kid of therapy.  

So about that yummy lunch.  It was left overs from the dinner the night before.  Chicken Taco Bowls.  I’m pretty sure I stumbled upon the recipe on Pinterest or Ziplist, not sure.  Either way it’s on a website called Budget Bytes.  She posts recipes that are budget friendly- awesome in my book. This is a slow cooker recipe that is not only super easy and delicious, but apparently gluten free.  (I make no promises, but check the ingredients and you tell me!)  So here’s the yummy recipe for my fiends at work and you too!


Taco Chicken Bowls

Serves: 9
Ingredients
  • 1½ lbs. chicken breasts 
  • 1 (16 oz.) jar salsa 
  • 1 (15 oz.) can black beans, drained 
  • ½ lb. (8 oz.) frozen corn 
  • 1 Tbsp chili powder 
  • ½ Tbsp cumin 
  • ½ Tbsp minced garlic 
  • ½ tsp dried oregano 
  • ¼ tsp cayenne pepper
  • ¼ tsp salt 
  • to taste cracked pepper 
  • 2 cups dry rice 
  • 8 oz. shredded cheddar 
  • ½ bunch cilantro (optional) 
 
Instructions
  1. Add everything except the rice, cheese, and cilantro to the slow cooker along with ¼ cup of water (for good measure). Give everything a good stir and make sure the chicken is covered in the mixture.
  2. Secure the lid on your slow cooker and cook on low for 8 hrs.
  3. Near the end of the cooking time, cook the two cups of rice according to the package directions (Bring the rice and 3 cups of water to a boil in a medium pot with a lid in place, as soon as it reaches a boil, reduced the heat to low and let simmer for 20 minutes. Fluff with a fork before serving).
  4. After 8 hours of cooking, carefully remove the lid of the slow cooker. Stir with a fork to shred the chicken (it should be super tender and will shred easily). Build the taco bowls by placing rice on the bottom, then the taco chicken mix, shredded cheese and fresh cilantro.

FREEZER instructions:

Put everything but the rice, cheese, and cilantro in the freezer bag.  When you’re ready for this bag of deliciousness, thaw and pour entire bag into the slow cooker for about 8 hours.  Shred the chicken and assemble your taco bowls.  

A Relaxing weekend!

Standard

The heat has finally taken a back seat. Don’t get me wrong, I live in California and it’s going to be hot this summer… 100+ is expected, just not in May! The end of the school year is just around the corner, and without some careful planning, things can spiral out of control very quickly! Saturday we charged up the gas grill and spent the day outside. Sitting in my freezer was a one of my favorite fish dishes, and a favorite of my 6 year old too-Grilled Orange Salmon. It’s a simple dish to prepare on your freezer day and grills up quickly on the grill. I had some homemade rice-a-roni left over and some pineapple…dinner served outside with a gentle breeze. A wonderful ending to a great day outside. This is the time of year that I love… Not too hot, not too cool, just right. As an added bonus, there were only a few dishes that slipped right into the dishwasher when dinner was done. Back to relaxing!

As I started thinking about the next month’s menu, I knew that the summer heat was coming. Some of you might wonder if I freezer cook in the summer since I’m not in school. The answer is yes. I’m teaching summer school for the first time, and it will be HOT this summer. My kitchen is in the same room as my tv room which is also on the westside of our house. You make anything on the stove or oven and your sweating too death. So, I’ll be using the crock pot and grill a ton! As an added treat, I’ll be cooking with my sister in law this month. I’m so excited to have someone to join me.

Grilled Orange Salmon
From The Everything Freezer Meals Cookbook

1/2 C orange juice
1/2 C honey
2 teaspoons orange zest
1 Tablespoon teriyaki sauce
2 1/2 lb salmon filet

Freezing day:
Combine all ingredients in a gallon sized bag. Add the salmon and seal. Freeze.

Cooking day:
Thaw in the refrigerator. Remove the salmon from the marinate and discard the marinade. Grill over medium heat skin side down until it flakes.

I have been using the frozen salmon fillets from Costco. They don’t have skin one them are individually wrapped, but easy to use! They can be a cheaper option in you want to indulge in this super yummy and healthier fish while staying in that budget tight rope.

Bread time

Standard

Happy Mother’s Day to all the moms, grandmothers, aunts, friends who are faux moms, and moms of the furry friends in our lives.  Our children are blessed to have you in their lives!

Today’s post is about a wonderful sandwich bread that I’ve been making for a couple of months.  In an attempt to save money and eat a more whole foods diet, I started hunting down a recipe for bread.  Let me begin by telling you that I am not a bread maker for a couple of reasons.  1:  It takes forever!  2: I never found a  yeast bread recipe that made bread soft and thin like the bread at the stores.  All the bread I had made in the past was heavy and dense.  Growing up my mom was lucky enough to be a stay at home mom.  She was there after school to pick me up and had a snack waiting for us.  She made most of our meals from scratch.  I can remember her making bread in a coffee can (back when coffee came in a metal can) and fresh pasta.  Like most moms, when she went back to work and my brother and i started having schedules more complicated than some businessmen, we began to eat out more and eat more ‘convenience’ food.  It’s tough to work all day, come home and get a healthy nutritious made from scratch dinner on the table, get it cleaned up, kids bathed, homework done, the next day prepped, and into bed before midnight!  This is one reason I love my freezer cooking and why I share it with you.

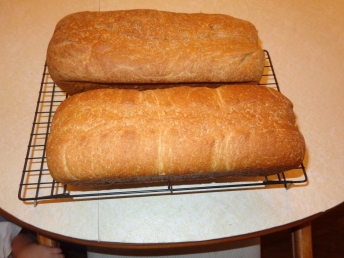
Here’s the recipe that I fell in love with.  I found it on Pinterest.  This recipe calls for vital wheal gluten.  I’ll be honest, I had never heard of this and Googled it upon reading the recipe.  The recipe says it’s optional, but I added it and think it makes it a much lighter bread.  I live in a small town and was able to find it at the local grocery store in the flour area.  Bob’s Red Mills makes some.  It’s a little pricey, but the small bag will last you quite some time since you only need a small amount for each batch.  It makes 3 small loaves.  I recently bought 2 new loaf pans from Amazon that were longer.  LOVE them.  Using this recipe I made 2 loaves.  You’ll want to make sure you freeze your extra loaves and keep the loaf you’re eating in the refrigerator since there aren’t any preservatives.  YES, you can freeze bread.  I wrap it in plastic wrap, then foil, and freeze it.  Take it out and unwrap it to defrost.  There are plenty of people who say to never put your bread in the refrigerator, but I do and it seems to work.  If you don’t eat a ton of bread, then make the smaller standard loaves that you’ll eat sooner.   Enjoy it!


Image
Homemade Wheat Sandwich Bread from Thriving Home
 

Yields: Makes: 3 loaves


Ingredients

  • 3 cups warm water (110-115 degrees)
  • 1 ½ tablespoons yeast
  • ¼ cup sucanat or packed brown sugar
  • 3 1/2 cups unbleached white flour, plus 1/2-1 cup more as needed (if dough is too sticky and for dusting the counter)
  • 3 1/2 cups white whole wheat flour
  • ¼ cup ground flaxseed
  • 1 tablespoons salt
  • 3 tablespoons vital wheat gluten, optional
  • 1/3 cup extra virgin olive oil
  • a cold stick of butter, optional

Instructions

1. In your kitchen aid mixer bowl, add warm water, yeast, and sugar. Stir until combined and let stand 10 minutes. Should become foamy on top, if the yeast was activated.

2. Meanwhile, in large mixing bowl, whisk together flours, flaxseed, salt, and vital wheat gluten (optional).

3. Add olive oil into the yeast/water mixture. Don’t stir. Then, stir in flour mixture until combined.

4. Using the bread hook, mix dough on a low setting in Kitchen Aid Mixer for about 10 minutes. Add a little more flour if it’s too sticky. Stop and take it off the hook every few minutes to assure it’s mixing well. (I do this about 3-4 times.)

5. Place in large greased bowl. Turn dough ball around in the bowl to get it greased all around. Then cover the bowl with a smooth dishtowel. Set bowl in a warm place and let it rise until doubled in size, about an hour.

6. Punch down the dough in the bowl. Then, divide evenly into three equal parts on a lightly floured surface.

7. Roll out each portion of dough with rolling pin to remove air bubbles. Then, roll up each one into a loaf size and put into a greased pan seam-side down. Spray tops of loaves with baking spray.

8. Cover and let rise again only until it’s doubled, about 30-45 minutes. Note: Do not let it over rise or the bread will deflate when it bakes!

9. Bake loaves on the middle rack at 350 degrees for 25-30 minutes or until top is golden brown.

10. Let loaves completely cool in the pan on a wire rack. Optional: Take a cold stick of butter after it’s done, and run it over the top as soon as it comes out.

11. Then gently turn the loaves out and slice on a cutting board. Tip: Using a bread knife, saw back and forth and don’t press down on bread.


Love my slow cooker!

Standard

Another week down….. this teacher only has a few more weeks until vacation. Friday’s are always long days… everyone is tired from the week, this teacher has the week’s worth of homework to correct and the week ahead to prep for, and my kiddos at home are ready for a break from the normal homework and bath routine. Usually we have homemade pizza on Friday’s. Tongiht however it was something from the slow cooker since we helped a friend at a pizza fundraiser last night. So wehn we went to work, dinner was already in the slow cooker doing it’s magic. It’s a wonderful feeling to come home after a long day and week to dinner warming and waiting for us… I have a favorite slow cooker. I’ve used one for as long as I can remember, and growing up my mom used one too. I had a smaller one that the crock didn’t come out of (not my favorite), a bigger one that had a dial and the crock removed to be washed, and my current one that I LOVE! Why you ask? It’s also my rice cooker! We bought it on a whim at Costco. (You’ve all bought something at Costco that wasn’t on your list, admit it!) It cooks both white and brown rice, slow cooks, steams, has a delay, and goes to warm when the timer is done. Here it is at Amazon. Here is tonight’s Parmasean Honey Pork roast. Hubby was great and made up a quick pot of pasta with a butter/parmesean sauce and some steam broccoli. Here’s to a wonderful weekend everyone!

Recipe from Joyously Domestic

Ingredients:

1 (3 – 4 pound) boneless pork roast
⅔ cup grated Parmesan cheese (yes, the powdered kind in the shaker canister)
½ cup honey
3 tablespoons soy sauce
1 tablespoon dried basil
2 tablespoons minced garlic
2 tablespoons olive oil
½ teaspoon salt

For Thickening Sauce –

2 tablespoons cornstarch
¼ cup cold water

Directions:

NOTE: The original recipe did not call for the roast to be seared first on the stove-top in a little oil, but I had already done so and it turned out great. So, I think it’s up to you.

Spray slow cooker with non-stick cooking spray. Place roast in slow cooker.

In a small bowl, combine the cheese, honey, soy sauce, basil, garlic, oil and salt. (I found the mixture to be a little too thick to pour over the roast [as instructed in the next step of the recipe], so I added in a tad bit of water to the mixture – maybe 1/2 – 1 cup.)

Pour over pork.

Cover and cook on low for 6 – 7 hours or until a meat thermometer reads 160°.

Remove meat to a serving platter and keep warm. (I cover mine with a little foil.)

Skim fat from cooking juices, if needed or desired. Transfer to a small saucepan. Bring liquid to a boil. Combine cornstarch and the 1/2 cup water until smooth. Gradually stir into pan. (I found that I did not need all of the cornstarch slurry.) Bring to a boil. Cook and stir for 2 minutes or until thickened. Slice roast and serve with gravy. (I didn’t use all of the sauce.)

A Kid Favorite

Standard

Happy Tuesday!  I’m sure everyone has picky eaters and most will tell you that I’m one of those picky eaters.  Tonight’s dinner is a kid approved favorite in our house.  In fact, my lunch plan is usually leftovers from the night before, and tomorrow’s lunch was in jeopardy is being eaten by my husband!  What is this delicious dish you might ask?  Bacon Cheeseburger Casserole.  Now, I will be the first to admit that it’s not the most attractive looking dish.  Don’t let looks prevent you from trying this dish.  It’s based on a recipe from Once A Month Meals and  makes 2- 8″ round pans worth.  Our family of 4 will empty the pan, so if you have a bigger family, you’ll want to make it into 1 dish. Of course I love to make this in disposable pans with lids that crimp on when I make them.  This dish does require some cooking on your BIG cook day, but it isn’t too difficult.  Well worth it!  Enjoy dinner everyone!


Bacon Cheeseburger & Fries Casserole

Ingredients:

  • 2 pounds lean ground beef, browned
  • 10.75 ounces cream of mushroom or cream of onion soup (make your own, or grab a can at the store)
  • 10.75 ounces cheddar cheese soup
  • 2 cloves garlic, minced
  • 2 Tablespoons dried minced onions
  • 1 teaspoons salt
  • 1 teaspoons pepper
  • 20 ounces frozen french fries or tater tots
  • 1/2 – 1 cup crumbled bacon
  • 1/2- 1 cup shredded cheese

Cooking day ingredients:

  • ketchup, mustard, BBQ sauce, pickle relish, or another other topping of choice

Directions:

In a large bowl, combine ground beef, both soups, garlic, dried  minced onion, salt and pepper.  Pour into 2 round or square cake pans.  I prefer to use the ones with the crimp lids.  Divide french fries or tots evenly over the top of the ground beef mixture.  Bake 350F for 45-50 minutes or until french fries are golden brown.  Top with crumbled bacon and cheese and return to the oven until the cheese is melted.  Add your favorite burger toppings and serve.

Freezing Directions:

Prepare as above, but do not bake.  Cover tightly with either aluminum foil or your crimp lid.  Be sure to label your dish and add the cooking day directions. When your’re ready to eat this dish, thaw first.  Bake 350F for 45-50 minutes or until french fries or tots are golden brown.  Serve with pickles, onions, and ketchup if desired.

Servings: 4 per pan (you could probably feed 5 or 6 if you don’t have kids that LOVE this!)

Notes:  An easy shortcut for using crumbled bacon is to buy the precooked variety.  I buy a big bag at Costco near the spices.  Fresh bacon also works, but takes longer and creates another pan for me to wash.  My husband prefers to put this dish under the broiler after adding the cheese and bacon to get it nice and bubbly.  Keep an eye on it or you’ll burn your wonderful dinner!

This recipe is based on the original Cheeseburger & Fries Casserole from Once A Month Meals.


Happy Cinco de Mayo

Standard

What a Monday!!  Every Monday could start with that comment.  The end of the year is quickly approaching… that means meetings and such after school.  Thankful again for my freezer!  After the meetings and then picking up my class’ fair projects to take BACK to school, it was nearly 7:00.  My lovely husband had already made dinner and all that was left was a lone plate sitting on the counter for me.  None the less, it was as simple as heat it up in the microwave and make a pot of Mexican spiced rice.  (Rice cooker rice plus some seasoning = Mexican flavored rice not from a box) The recipe for tonight’s dinner came from the book Don’t Panic, Dinner’s in the Freezer by Susie Martinez, Vanda Howell & Bonnie Garcia.  I made some minor changes to it to make it a little bit healthier and easier.  You can of course change it to suite your needs.

Image

Chimichanga and Rice

Ingredients

1 t salt

2 lbs. ground beef (you can easily substitute chicken or other meat)

2 cloves garlic, crushed (I added 2 spoons of garlic from the BIG jar)

2 t ground cumin

2 t oregano, crushed (I used ground)

1/2 taco sauce (didn’t have taco sauce, used enchilada sauce)

1/2 cup sour cream (used cream cheese)

1/4 cup vinegar

Instructions:

1.  Sprinkle salt in skillet over medium heat.  Brown beef, garlic, and spices.  Cooke until meat looses it’s pinkness.  Stir in remaining ingredients.

** You can stop here and freeze the meat mixture now.  On cooking day you will load them into the tortillas and bake.  I like to make them all the way done, freeze them individually, and then simply defrost and reheat on the day I want them.  Makes it easier to take to work too.

2.  Melt butter in a pan or spray each tortilla with butter spray (healthier).  Fill with about 1/3 cup of filling.  Fold the tortilla up like an envelope.  Place seam side down in an ungreased 11×17 pan.  Continue with the remaining tortillas.  (Should be about 9).

3.  Bake at 500 degrees until crispy, about 15 minutes.  Sprinkle with cheese and return to the over to melt.  Top with your usual toppings: lettuce, sour cream, avocado, or tomatoes.  (Mine didn’t get all the extras!)


YUMMY YUMMY for the TUMMY!  

I’m back!!

Standard

Well I have been gone for awhile from my blog, but rest assured my freezer and I have been very busy!  So busy that I have not had much time to write the blog.  Lol. Many things have changed since my last post.  Our family grew by 1, giving us 2 beautiful boys.  I know am the proud owner of a used stand up freezer.  SO LOVE MY FREEZER!   We froze lots of things before our stand up freezer, but now we are able to freeze larger items, including MILK!  Yes, you can freeze milk.  So we now buy 4 galls on milk at Costco and are able to freeze them and use one each week.  People often ask my why I freezer cook or why I spend an entire weekend cooking.  I know I have shared some reasons before, but recent changes in my husband’s employment have reaffirmed my reasons for cooking once a month.  We used to get paid 2-3 times a month.  Now, we both get paid only once, and on the same time.  My freezer cooking is an integral part of out budget.  We shop once a month and cook once a month.  We don’t really eat out, saving our diets and our wallets!

The first weekend of each month is my cooking weekend for 2 simple reasons… it’s our payday and by the end of the month, our freezer is just about empty.  I was sharing with my husband today that I have a love hate relationship with my cooking weekend.  I love having a month’s meals (breakfasts, lunches, and dinners) all done and ready to go, but I HATE how tired I am at the end.  We split it up over 2 days this time.  We could have done it all at once, but I got a late start the first night after a shopping trip to Costco and my feet always bark at me when I do a full day of cooking!

Today’s focus is breakfast.  As a teacher and mom I know the importance of a healthy breakfast with protein to keep you going all day long.   I also know that morning’s are hectic.  kids to drop off at school and day care, moms and dads out the door to work, and everything happening  very quickly.  To keep myself organized, I have 5 simple breakfasts, all cooked and ready to go into the microwave.  I also like to keep things in a routine so I don’t have to really think.  🙂

Monday’s are breakfast burrito day.  I have an intolerance to egg yolks, so all of my breakfast items are made with egg whites.  A healthier option but you can easily substitute whole eggs.  Start with frozen hash browns.  I cook them on the stove top.  When they are done, (usually about 6-7 minutes), pour in eggs and crumbled meat.  My preference is crumbled bacon, but I also use crumbled breakfast sausage.  Love bacon??  Costco has cooked crumbled bacon, usually near the baking or salad aisle.  OMG!!  Grab a handful and drop it in.  Easy peasy, lemon squeezey!  Top with cheese and you’re done with the filling.  Start with a stack of tortillas.  I use an ice scream scoop to scoop and fill.  Roll, wrap in foil, and you’re all done!

Tuesday’s are pancake day!  The kids love pancakes and I know what your saying… “All that sugar and where’s the protein?”  Simple.  I cook a package of breakfast sausage each week.  The package comes with 16 links- 2 per person, twice a week.  So with the pancakes we serve sausage.  Lower the sugar count with less syrup or even better, top the pancakes with peanut butter!  Today I cheated- a big box of Bisquick and my kitchen aid!  I added some chocolate chips to some, fresh blueberries to others.  HUGE batch.  Freeze them flat and then bag them up.  Then you can either pop them in the microwave or toaster in the morning.  Just like the frozen box of waffles or pancakes, but much cheaper and a bit healthier too.  Of course, you can always make your pancakes from scratch and then freeze them.

Wednesday’s are breakfast quesadilla’s.  Go back to the filling you used for your burritos, but leave out the cheese.  I then use my griddle for the cooking.  Lay out a tortilla and sprinkle a bit of cheese.  Add the egg/potato mixture.  Top with a little bit more cheese and cook!  I cut mine in half so share since my kids are younger and don’t eat an entire one.  Wrap them in foil individually and freeze them in a big bag.  I usually take a frozen one, and place it in the oven when I get up.  Set the oven to about 350.  By the time your showered and ready to eat, about 30 minutes in my house, they should be warm and ready to eat!

Thursday’s are French Toast Sticks.  I found a great recipe on Pinterest, but like most things you find on the internet, it didn’t quite work as I planned.  So I’ll tweak it.  Basically, you take some really nice thick bread, slice it into sticks, dip into your mixture of eggs, spices, and mil/heavy cream, and cook on the griddle.  Freeze them flat before you bag them.  Again, we serve them with sausage for protein.

Friday’s used to be doughnut day.  Each Friday I would take my son to get a doughnut before dropping him off at school.  BUT, doughnut’s aren’t the healthiest way to start to the school.  So Friday’s are now muffin dayI love Costco sized muffins and I really am not a fan of small muffins.  So I bought a jumbo muffin pan.  I make 4 batches each month.  I found a good recipe for Costco like muffins that uses a cake mix as a starter. I’m always looking for ways to save the budget.  On a shopping trip to a large bulk store I found a bulk cake mix.  Perfect I thought.  Well, maybe not.  After multiple tries to make my muffins, each with little success, I am back to the boxes. Choose your favorite muffin recipe and you’re set.  Serve with yogurt for an easy breakfast and healthy too!